This post will share some of the techniques that I've found work for me when tatting using the Front Side / Back Side method. As I do (and have done) with any project, I try to plan ahead. If I have a pattern in hand, my first decision deals with thread size for the use of the project I am planning. Then I need to decide whether it will be a single color, a series of monochromatic colors, or just whatever strikes my fancy. Then, it's off to the stash of that particular size (I do have most of my thread segregated in bins by size) to see if I have enough thread or the colors I thought about. Sometimes, of course, I have to make different selections of colors. Most of the time, the size won't change because I have a specific use in mind. Once the threads are selected, I see what shuttles are "speaking" to me for the particular project. I know this may seem strange to you but my shuttles and thread along with the pattern will tell me which shuttle type is best; i.e., post or bobbin, and with or without a point or hook. These are thoughts about how to do FS/BS tatting but do not include exact "how-to's" for any technique as there are glossaries, blog posts, and other online articles from many sources that discuss those mechanics.
Before I begin to wind shuttles to make a single stitch, I make a copy of the pattern (for my own use; this is NOT a violation of copyright) and read through it thoroughly. I will make initial notes on my copy; sometimes I will even write the pattern in more modern notation if it is one from the 1920s to 1960s. I then look at the entire piece again, picture and/or diagram, to determine whether I am tatting this in the traditional manner or whether I want to put in the effort to create a stunning piece that is FS/BS. I keep the copy with all notes (before, during, and after tatting) in a journal and reference it to the original, especially if the pattern is in one of my books.
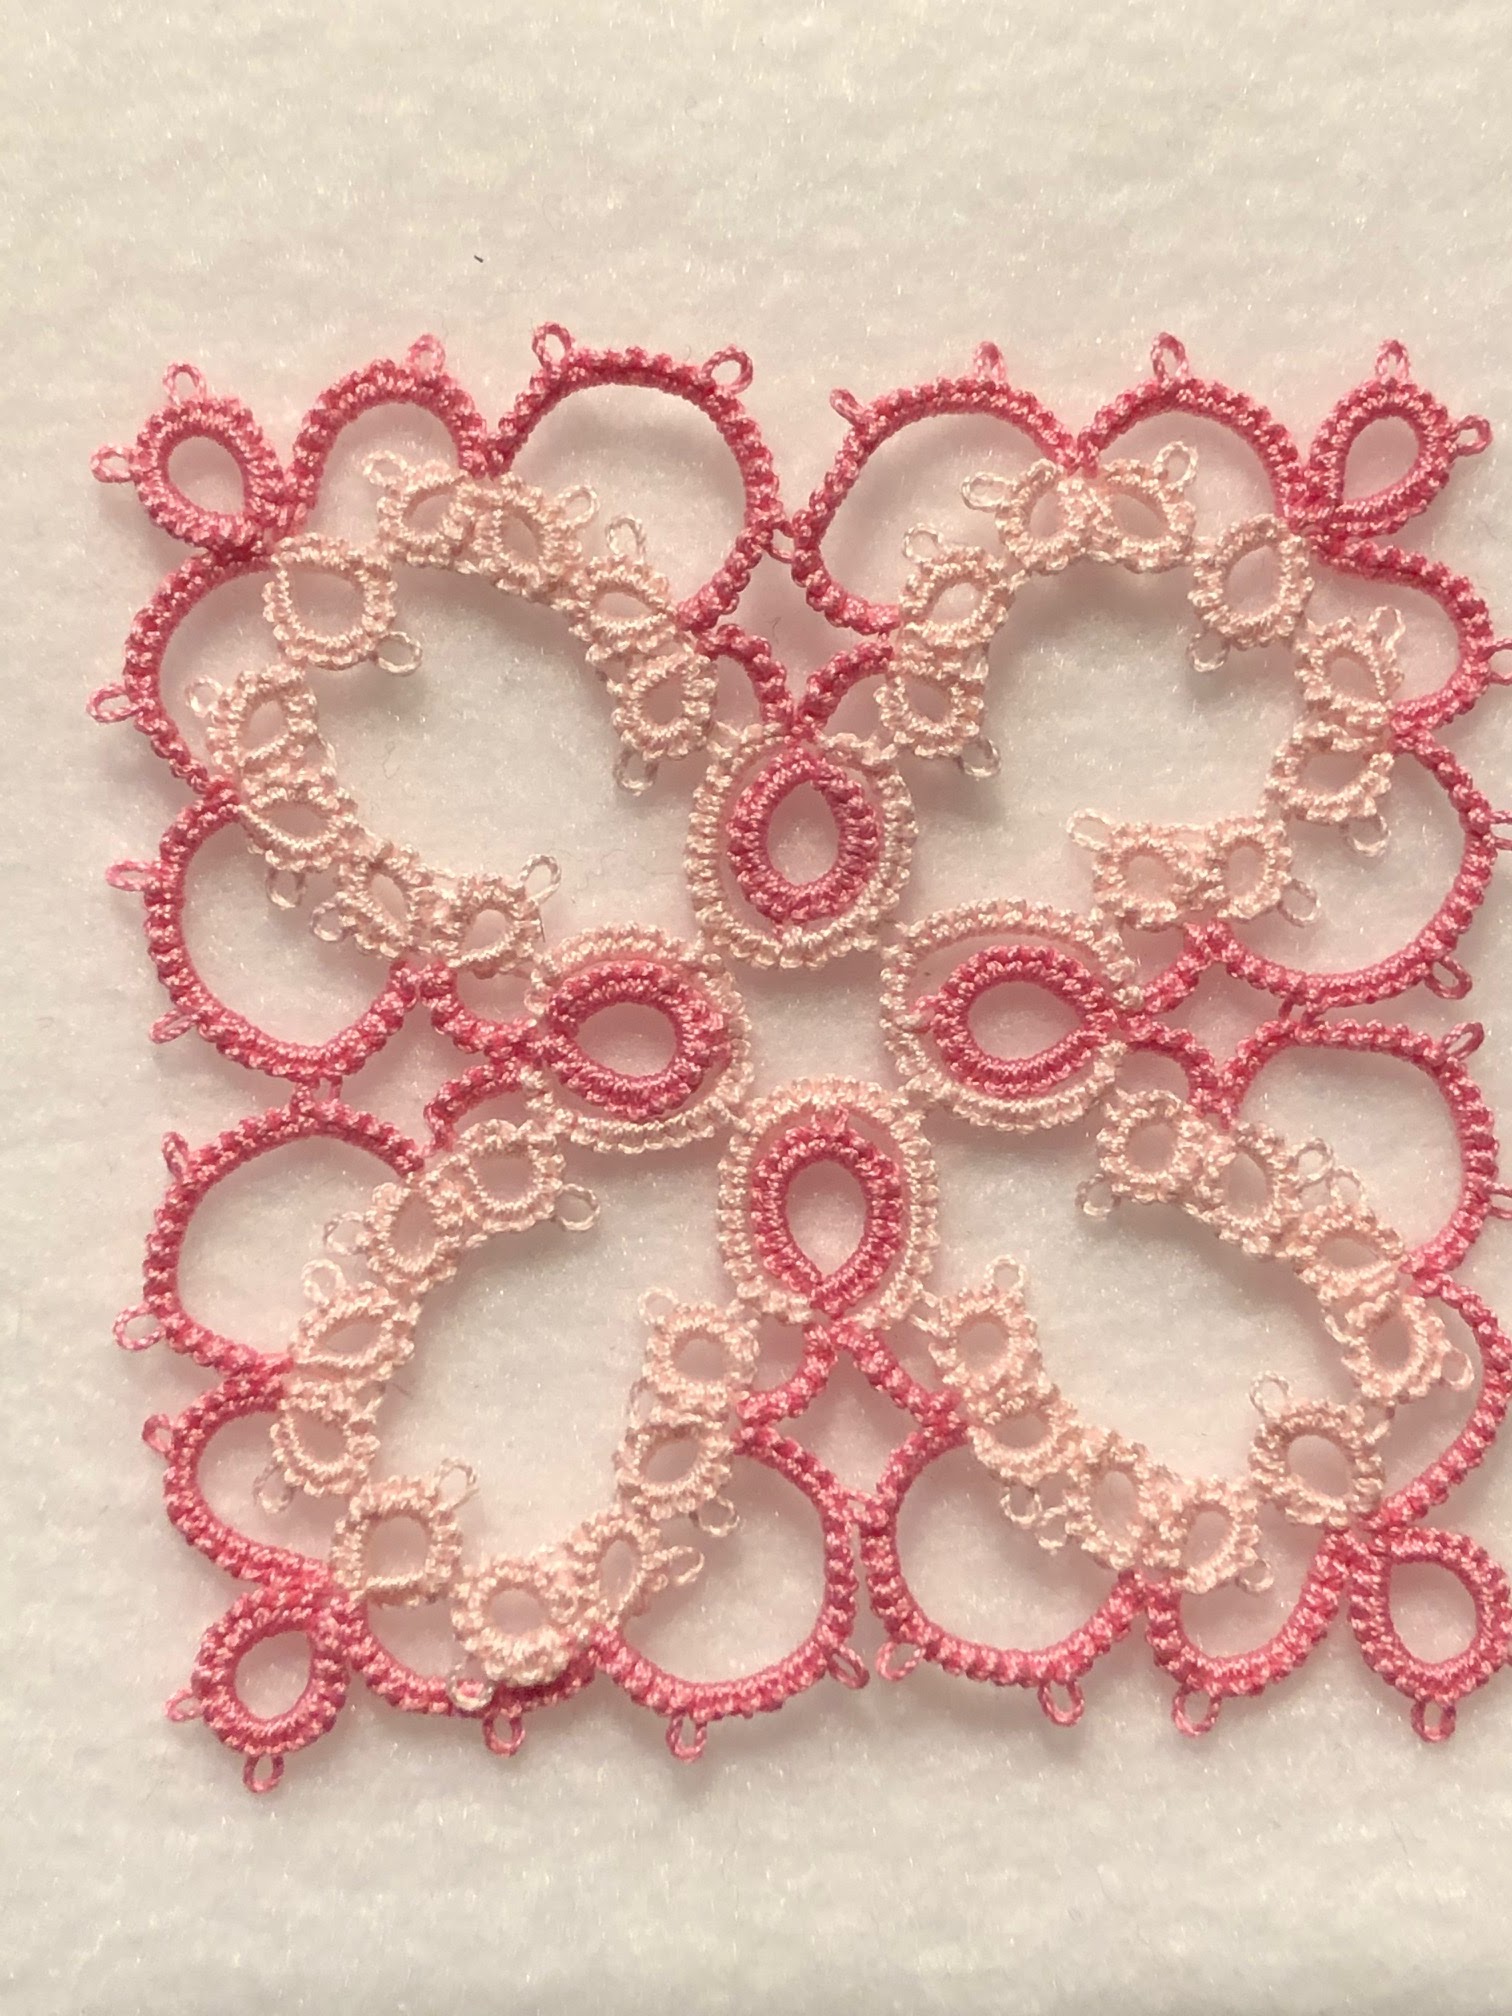
If the piece is made predominately of rings, then the rings will be tatted in traditional ds mode and be the dimensional feature of the front side. Where the "d" is the first half (slip and slide method) meaning it is under, over, and flipped onto the core thread. That makes the "s" the second half which goes over, under, and flipped onto the core thread. If the piece has mostly chainwork (an example is the square pinwheel pattern from Dora Young's All New Knotless Tatting Designs), I will use the chains as my frontside as my tension on chains is more even this way; therefore my rings will be on the backside and tatted using Reverse Order Double Stitch (RODS or sd).
FRONT SIDE / BACK SIDE - generally
If the piece is all one color, joins on the front side of the work will be Down Joins and count as a first half or "d" then followed by a second half or "s." This type of join was once referred to as a Dem-Rice join as it was popularized in the 1990s by Bobbie Demmer and Marie Rice (IOLI Journal, Fall 1993). Through Bobbie's research (probably due to the GLLG Tatting Teacher Certification Program), she learned that the down join had been used by Pat Perry and decades before that by Anne Orr. Most likely, its roots go back further and therefore the technique is known simply as a Down Join.
Conversely, if I am working on the back side of the work, the joins are Up Joins and again count as the first portion (an "s" in this case) followed by a "d." This "rule of thumb" is followed throughout the work regardless of the type of element joined. Both types of joins (UP or DOWN) will allow the stitches to slide along the core thread. Being able to slide the double stitches along the core thread allows the tatter to evenly distribute all the double stitches (ring or chain) evenly.
Lock joins can be tricky but I find that I like pulling my lock joins to the back rather than to the front.
If the rings are the FS, they are all tatted "ds" but if there are rings that are tatted from the back side, they are tatted in RODS ("sd"). All chains on the backside are tatted RODS and if they fall on the front side, the "ds" order is followed.
Above all, I do my very best to be consistent and that action contributes to the overall beauty of the piece. The easiest explanation of the differences I know is to look at the tatting from the "edge" of the work. For traditional, a Ring-Chain-Ring combination will look like this:
R: ----v----v----v----. Ch: ----^----^----^----. R: ----v----v----v----. ("v" or "^" are picots (the point of the character indicates which direction the picot will curve, "-" is a double stitch as ds, and a period(.) indicates the end of the element where the work will be reversed)
For the Front Side / Backside, the same Ring-Chain-Ring combination would look like this:
R: dsdsdsds v dsdsdsds v dsdsdsds v dsdsdsds. Ch: sdsdsdsd v sdsdsdsd v sdsdsdsd v sdsdsdsd.
R: dsdsdsds v dsdsdsds v dsdsdsds v dsdsdsds. For clarification, there is no spacing except for the written illustration here of the direction that the picots will point in relation to the double stitches. You will notice that all the picots "point" in the same direction. In my previous post, I used the analogy of viewing your hands.
SPLIT RINGS - the mental exercise of FS/BS tatting
The reason many tatters do not like FS/BS, I think, boils down to the mental exercise required for split rings ("SR") if any are required to be on the backside of the work. Split rings on the front side are pretty easy and don't really require a lot of thought ... just practice. BTW, my preferred method of doing an SR could be termed a modified "dead spider" as I simply tilt my pinch hand slightly away from my body; the top portion of the thread around my hand is in the line of progression (clockwise for me) and the stitches are flipped. Any stitches below the line of progression (below my thumb or on the 'bottom' portion of the ring) get the wrapped or unflipped stitches (counter-clockwise). BTW, whenever I close a ring, whether I drop the shuttle or not, I keep the ring in my pinch snugly to help guide it closed as I draw up the core thread.
The stitches completed in front of the slash ("/") mark are flipped and the unflipped stitches after the "/" are wrapped in RODS. When the SR is closed, the appearance is full double stitches throughout the entire ring. One of the biggest challenges I find for myself is that my wrapped (unflipped) stitches tend to be tighter onto the core thread than my flipped stitches and this deals with tension. For my split rings to be the same size as other rings (with the same stitch count), I need to concentrate a bit more to NOT wrap those unflipped stitches so tightly.
The challenge of FS/BS in combination with SRs is that any tatted on the back side of the work are RODS. Not so difficult are the flipped stitches on the BS split ring as they are RODS and do not require a great deal of thought. For the unflipped stitches, however, I always have to stop, think where I am, and do them wrapped (unflipped) in the "ds" sequence. I cannot begin to relate to the reader how many split rings I have retro-tatted because I failed to take notice of the position and sequence.ll
Additional but not last thoughts on tatting, generally!
Thoughts about ring shapes. - You can give your rings two general, basic shapes. If you want your rings to have an oval (or teardrop) shape, on the front side of the work, do NOT drop (or post) the shuttle through the rings before closing. Keep the ring in your pinch so that you can guide the ring closed and prevent that last or first half stitch from unflipping and forming a lock stitch. If you are on the back side and want the oval shape, DROP the shuttle through the ring before closing.
- If you want a rounder-shaped ring (front side), drop the shuttle through the ring before closing. This action makes a ring easier to open (if you need to do so) and can help more 'aggressively' prevent a half stitch from unflipping and therefore creating an unwanted lock stitch. If you are on the back side, do not drop the shuttle through the ring.
- Depending on your pattern, both shapes of rings can be used effectively with attention to detail and overall appearance.
Other "technical" suggestions have worked for me. - If I have more than a single ring before transitioning to a chain, I use teardrop-shaped rings. This keeps the bases of the rings closer together and helps in controlling "gaposis" between ring and chain elements. This action is especially helpful for clover or trefoil series of rings.
- On Split Rings, I will only drop the working (core thread) shuttle only through the ring for rounder shapes.
- I have begun using my thumbnail with each half-stitch to 'set' the stitch in place along the core thread. It took a little practice at first but really helps the look work in progress and eases some of the onus of blocking.
Joins for tatting with two or more colors can be tricky. - One of the first decisions for you is whether the joins and the consequent "color blips" a part of the design features or are merely construction aids. If the color blips are to be minimized, do Up Joins on the FS and follow with full double stitches; i.e., joins are NOT included in the stitch count. Tatting on the backside has Down Joins followed by full double stitches. If however, you want the blips as part of the design effect, use Up Joins and full double stitches following the join on the front side and Down Joins followed by full double stitches on the backside. Sometimes, the best way to go forward is to tat some samples to determine how to implement the look you envision.
- There are several other joins that could be used to minimize color blips but you need to determine how to journey forward and what will work best for you. You should also familiarize yourself with the major construction on any join whether the join creates a lock join (interrupts the core thread) or allow the double stitches to slide along the core thread.
Additional thoughts:- Be cognizant that there are many techniques in our digital world that have different names reflecting different cultures and languages but are rediscoveries of older and well-established techniques sometimes with simpler, more descriptive names.
- Whenever I need to do a split chain, honestly I consult Judi Banashek's Impeccable Tatting, (c)1995, pg 43. This information was also published by the Ring of Tatters (with Judi's permission) in their Autumn 2000 Newsletter, pg 43. Note that this is generally the same as Dora Young's Knotless Method.